Balcony installation quality: what to check on site and at handover
A new balcony can look perfect in a photograph, yet straight railings and an attractive finish reveal only part of the installation quality. Details that disappear from view also matter: the condition of the substrate, the actual anchorage arrangement, connection components and the junction with the façade. Balcony installation inspection should therefore start before the first structure is installed and continue until recorded defects have been resolved.
This guide helps building managers, apartment owners’ associations and residents’ representatives prepare questions, agree inspection stages and keep clear records. It is an indicative checklist for the client. It does not replace the design, installation instructions or assessment by a structural engineer or qualified construction inspector. The approved documentation and the products actually used determine the requirements for each building.
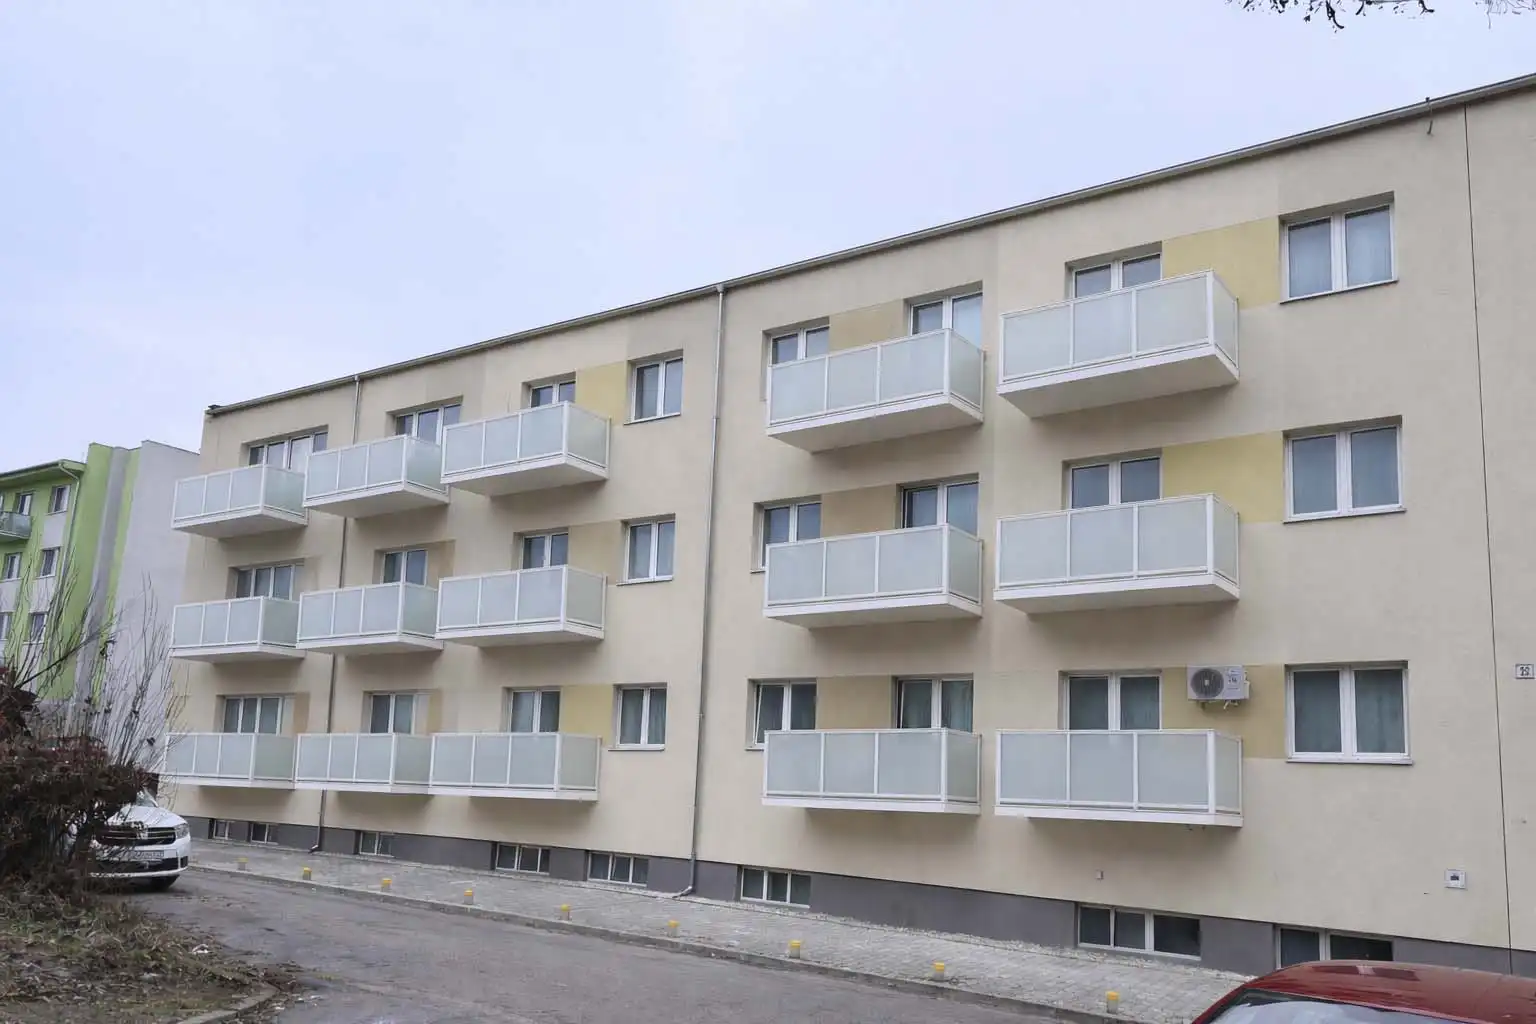
This photograph of an HS ALUSYSTEM balcony solution illustrates the finished appearance. It does not, by itself, document inspection of concealed connections or handover of a particular project.
1. Agree who checks what
The building manager coordinates and collects records
The manager or authorised owners’ representative monitors the agreed scope, site access, resident communications and records of defects. They can flag a damaged finish, a blocked outlet or infill that differs from the specification. Their signature should not, however, replace a specialist’s confirmation of anchorage suitability or structural capacity.
Technical questions need an identified decision-maker
Before work starts, identify the contractor’s responsible representative, the person providing the agreed technical inspection and how the designer will be consulted. Record who needs to attend each inspection and who decides whether work may proceed. The suspended balcony installation page explains the general process; the actual inspection stages must reflect your project.
2. Check the documentation before installation
The correct revision must be available on site
Compare drawing references, balcony quantities, dimensions, infill types and associated works against the contractually agreed scope. A revised drawing must be identifiable, so an earlier version is not accidentally used on the next floor. Do not leave changes buried in an informal message exchange: each needs a reference, date and traceable response from the relevant responsible person.
Product records must match the delivered components
Request identification of significant components and the technical documentation appropriate to the design and supply. For an anchor, the specialist must be able to connect its site identification to the relevant instructions and assessment. EOTA explains the European Technical Assessment, or ETA, which identifies assessed product characteristics and intended use. Possession of that document does not by itself confirm that an anchor has been correctly installed on your building.
3. Inspect the substrate before it is concealed
The actual condition of the load-bearing structure matters
Opening up an area may reveal a different material, damage, an earlier repair or a dimension that was not allowed for in the documentation. Mark the location and obtain a technical assessment before proceeding. Insulation and render do not automatically provide a load-bearing substrate for a balcony structure. Any change must be assessed by the designer or structural engineer as appropriate, rather than improvised by the installation crew.
The inspection should take place while the detail is safely accessible. A photograph of the finished cover will not show the original wall condition later. When planning suspended balconies, allow time in the programme for inspection of exposed locations and resolution of discrepancies.
4. Geometry: measure against an agreed reference
Dimensions need a datum and a tolerance
Checks cover position, level, alignment of balconies above one another, distance from the façade and the interface at the doors. The design should identify what is measured and which deviations are acceptable. Comparing an installation only with an uneven façade can be misleading; even a visually irregular gap may have a technical explanation.
Use the first installed balcony to confirm how measurements will be taken and recorded. Then inspect the remaining positions according to the agreed plan. A repeated detail makes checking easier, but does not prove that every substrate and connection has been executed identically. Assign each observation to the exact floor and balcony.
5. Anchorage and connections require specialist inspection
Do not assume a universal tightening torque
The anchor type, position, embedment depth, hole preparation, installation conditions and any tightening requirements come from the design and the specific manufacturer’s instructions. Bonded anchors also require attention to the specified conditions and curing times. This article does not prescribe a single value for all aluminium balconies. Without knowing the particular system, such a value could lead to incorrect installation.
Request records before connections are covered
Technical inspection should also verify specified bolts, washers, locking devices and other connection components. Photographs improve traceability, but cannot replace measurement or a specified test. If anchor tests are needed, the responsible specialist must define their scope, method and evaluation. A building manager must not test capacity by loading the balcony themselves or subsequently tightening its connections.
6. Assess the railing together with the finished floor
Height, openings and fixings form a complete system
Balcony railings are checked in relation to the final walking surface, rather than the bare frame alone. Pay attention to junctions at walls, openings, edges, infill fixings and conformity with the approved arrangement. A loose component or damaged glass requires technical assessment; do not test its resistance by leaning against it or striking it.
Where only the railing is being replaced, the original balcony slab may provide the fixing substrate and its condition needs separate assessment. The article on balcony railing height and safety explains these relationships in more detail. Glass railing infill does not mean that the balcony is fully glazed or enclosed.
7. Check drainage as a complete water route
Inspect where the water ultimately goes
The presence of a visible outlet is not enough. The relationship between the floor, falls, joints, edges and discharge point matters. Construction debris must not remain in drainage openings. Inspection should identify risks of water running onto the façade, a lower balcony or the building entrance, and compare the installation with the design.
If a water test has been agreed, its method must respect the floor build-up and site safety. Do not flood the balcony on your own initiative, especially where the threshold or waterproofing is unfinished. Record the test conditions, observations and any defects. The balcony drainage guide explains the practical connections between these details.
8. Inspect finishes and the façade junction
Distinguish appearance from the function of a detail
Inspect the finish after appropriate cleaning and under agreed viewing conditions. Record scratches, damaged edges, mismatched components and remaining installation materials. Repair methods should suit the coating system; local repainting may not restore the original performance or appearance. The KOMAXIT powder coating page provides further context.
At the façade, check cover pieces, sealing of specified joints and completion of adjoining works. Not every gap should be sealed: some allow movement or drainage. Details should therefore not be repaired by applying sealant indiscriminately without understanding their purpose. Where responsibility at an interface is unclear, identify which contractor will complete the work and who will inspect it afterwards.
9. Schedule inspections at the right stages
A practical plan may include the following milestones; agree the exact scope for your building:
- Before work begins: current documentation, responsible people and access for inspections.
- After exposing the substrate: confirmation that actual conditions match the design and discrepancies have been resolved.
- Before covering anchors and connections: technical inspection and the required records.
- After installing the assembly: geometry, floor, railing and adjoining details.
- Before allowing access: drainage, removal of hazards and a clearly established status for use.
- At handover and follow-up inspection: a defect list, deadlines, responsibilities and verification of repairs.
This plan helps avoid inviting the client to inspect a detail only after it has been completely concealed. Clarify inspection and any testing costs when comparing quotations. The suspended balcony pricing page explains how the scope affects the budget.
10. A defect list must support closure of every item
Instead of writing “repair railing”, record the exact location, observed condition, photograph reference and required next step. For example: “Balcony B-12, second floor, coating damage on the outer post; photograph B12-03; propose and agree the repair method.” This is an example record, not a finding from an actual project.
Each item should identify the responsible person, agreed deadline and result of the follow-up inspection. Distinguish unfinished work, cosmetic defects and suspected functional or safety problems. The relevant specialist should assess technical significance. A photograph after repair may not be sufficient if a measurement or test was required.
11. Safe use must be explicitly addressed
During installation, do not release a balcony for use simply because its floor and railing are already in place. Access and the start of use depend on completion status, instructions from the responsible people and the conditions of the particular project. If structural movement, a loose component or damaged infill is observed, prevent use of the affected area and notify the building manager and contractor.
At handover, instructions for use, maintenance and fault reporting should also be clear. Determine the handover documentation from the design, contract and work performed. This article does not establish a universal list of legally mandatory documents or determine the legal consequences of signing a handover record.
12. Plan inspections with HS ALUSYSTEM
When preparing a new balcony project, send the building address, proposed number of structures, available drawings and photographs. State whether the scope covers complete balconies or balcony railings only, and who will represent the owners during inspections. Explore examples in the HS ALUSYSTEM project references.
Contact HS ALUSYSTEM to discuss the next steps for your building. Alongside the manufacturing and installation scope, request confirmation of inspection milestones, documentation and the process for handling deviations. Agreeing these points early makes it easier to demonstrate quality during the works and at handover.
Frequently asked questions about balcony installation inspections
Is inspection at final handover enough?
No. The substrate, anchors and some connections may already be concealed. Agree intermediate inspections before covering these areas and retain records linked to each specific balcony.
Can a building manager personally confirm that the anchorage is correct?
The manager can check that documentation is available and record observations. Technical confirmation of the anchorage must be provided by a suitably qualified person within the agreed inspection scope.
Does a photograph prove that a connection is correctly installed?
A photograph is useful evidence, but does not establish every connection parameter, such as concealed dimensions or specified tightening. Depending on the design, it should be supplemented by an inspection record, measurement or test.
What happens if the substrate differs from the design?
The affected detail should not be completed using an improvised solution. Record the finding, refer it to the responsible specialist and proceed according to the confirmed method.
When can a defect be considered resolved?
When the agreed remedial work has been completed and its result verified by the designated person. The closure record should include the inspection date and outcome, together with any relevant measurement or test.